Instructions
This sample represents a step-by-step instructional document explaining how to create a two-column layout in Adobe InDesign. The document focuses on clarity, visual support, and organization for beginner users.
📄View PDF
How to Create a 2-Column Layout in Adobe InDesign
Step 1: Click File in the top menu.
Step 2: Click New.
Step 3: Click Document.
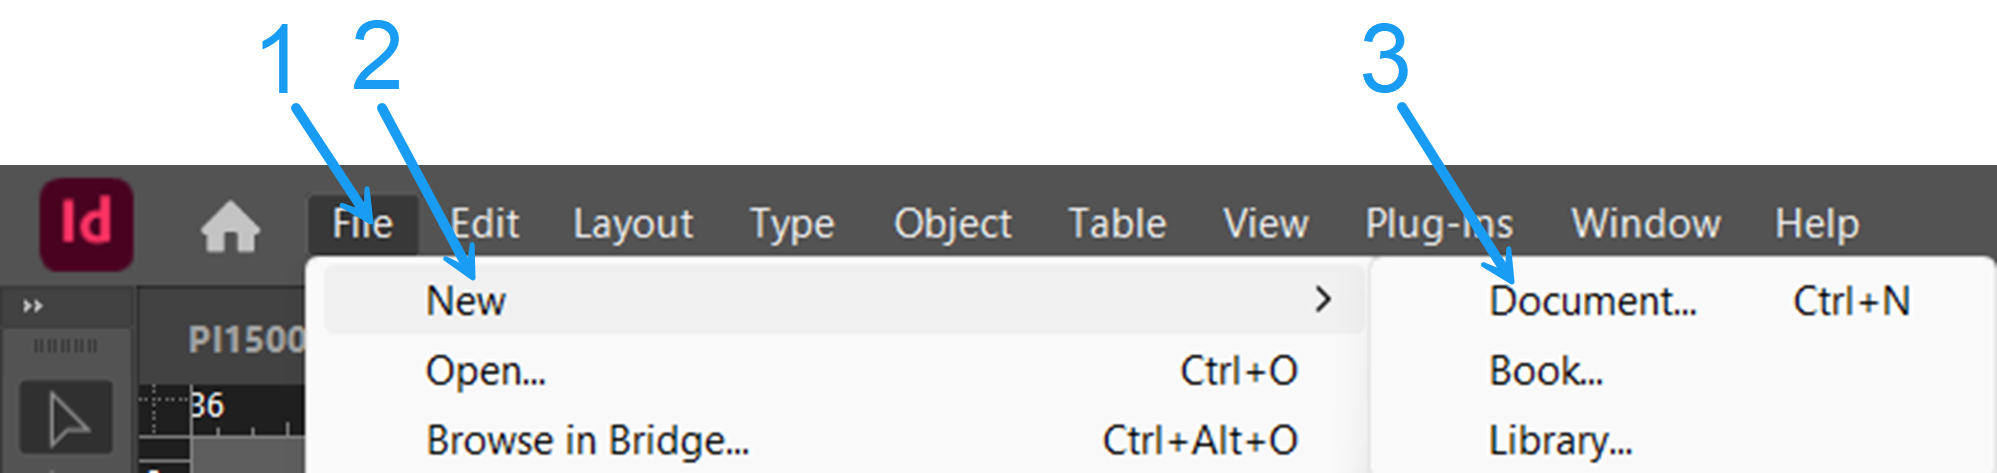
Figure 1: Create new document. (Source: Noah Long)
Step 4: Set the page size to 8.5 x 11” portrait.
Step 5: Set all four margins to 0.5”.
Step 6: Click Create to open the document.
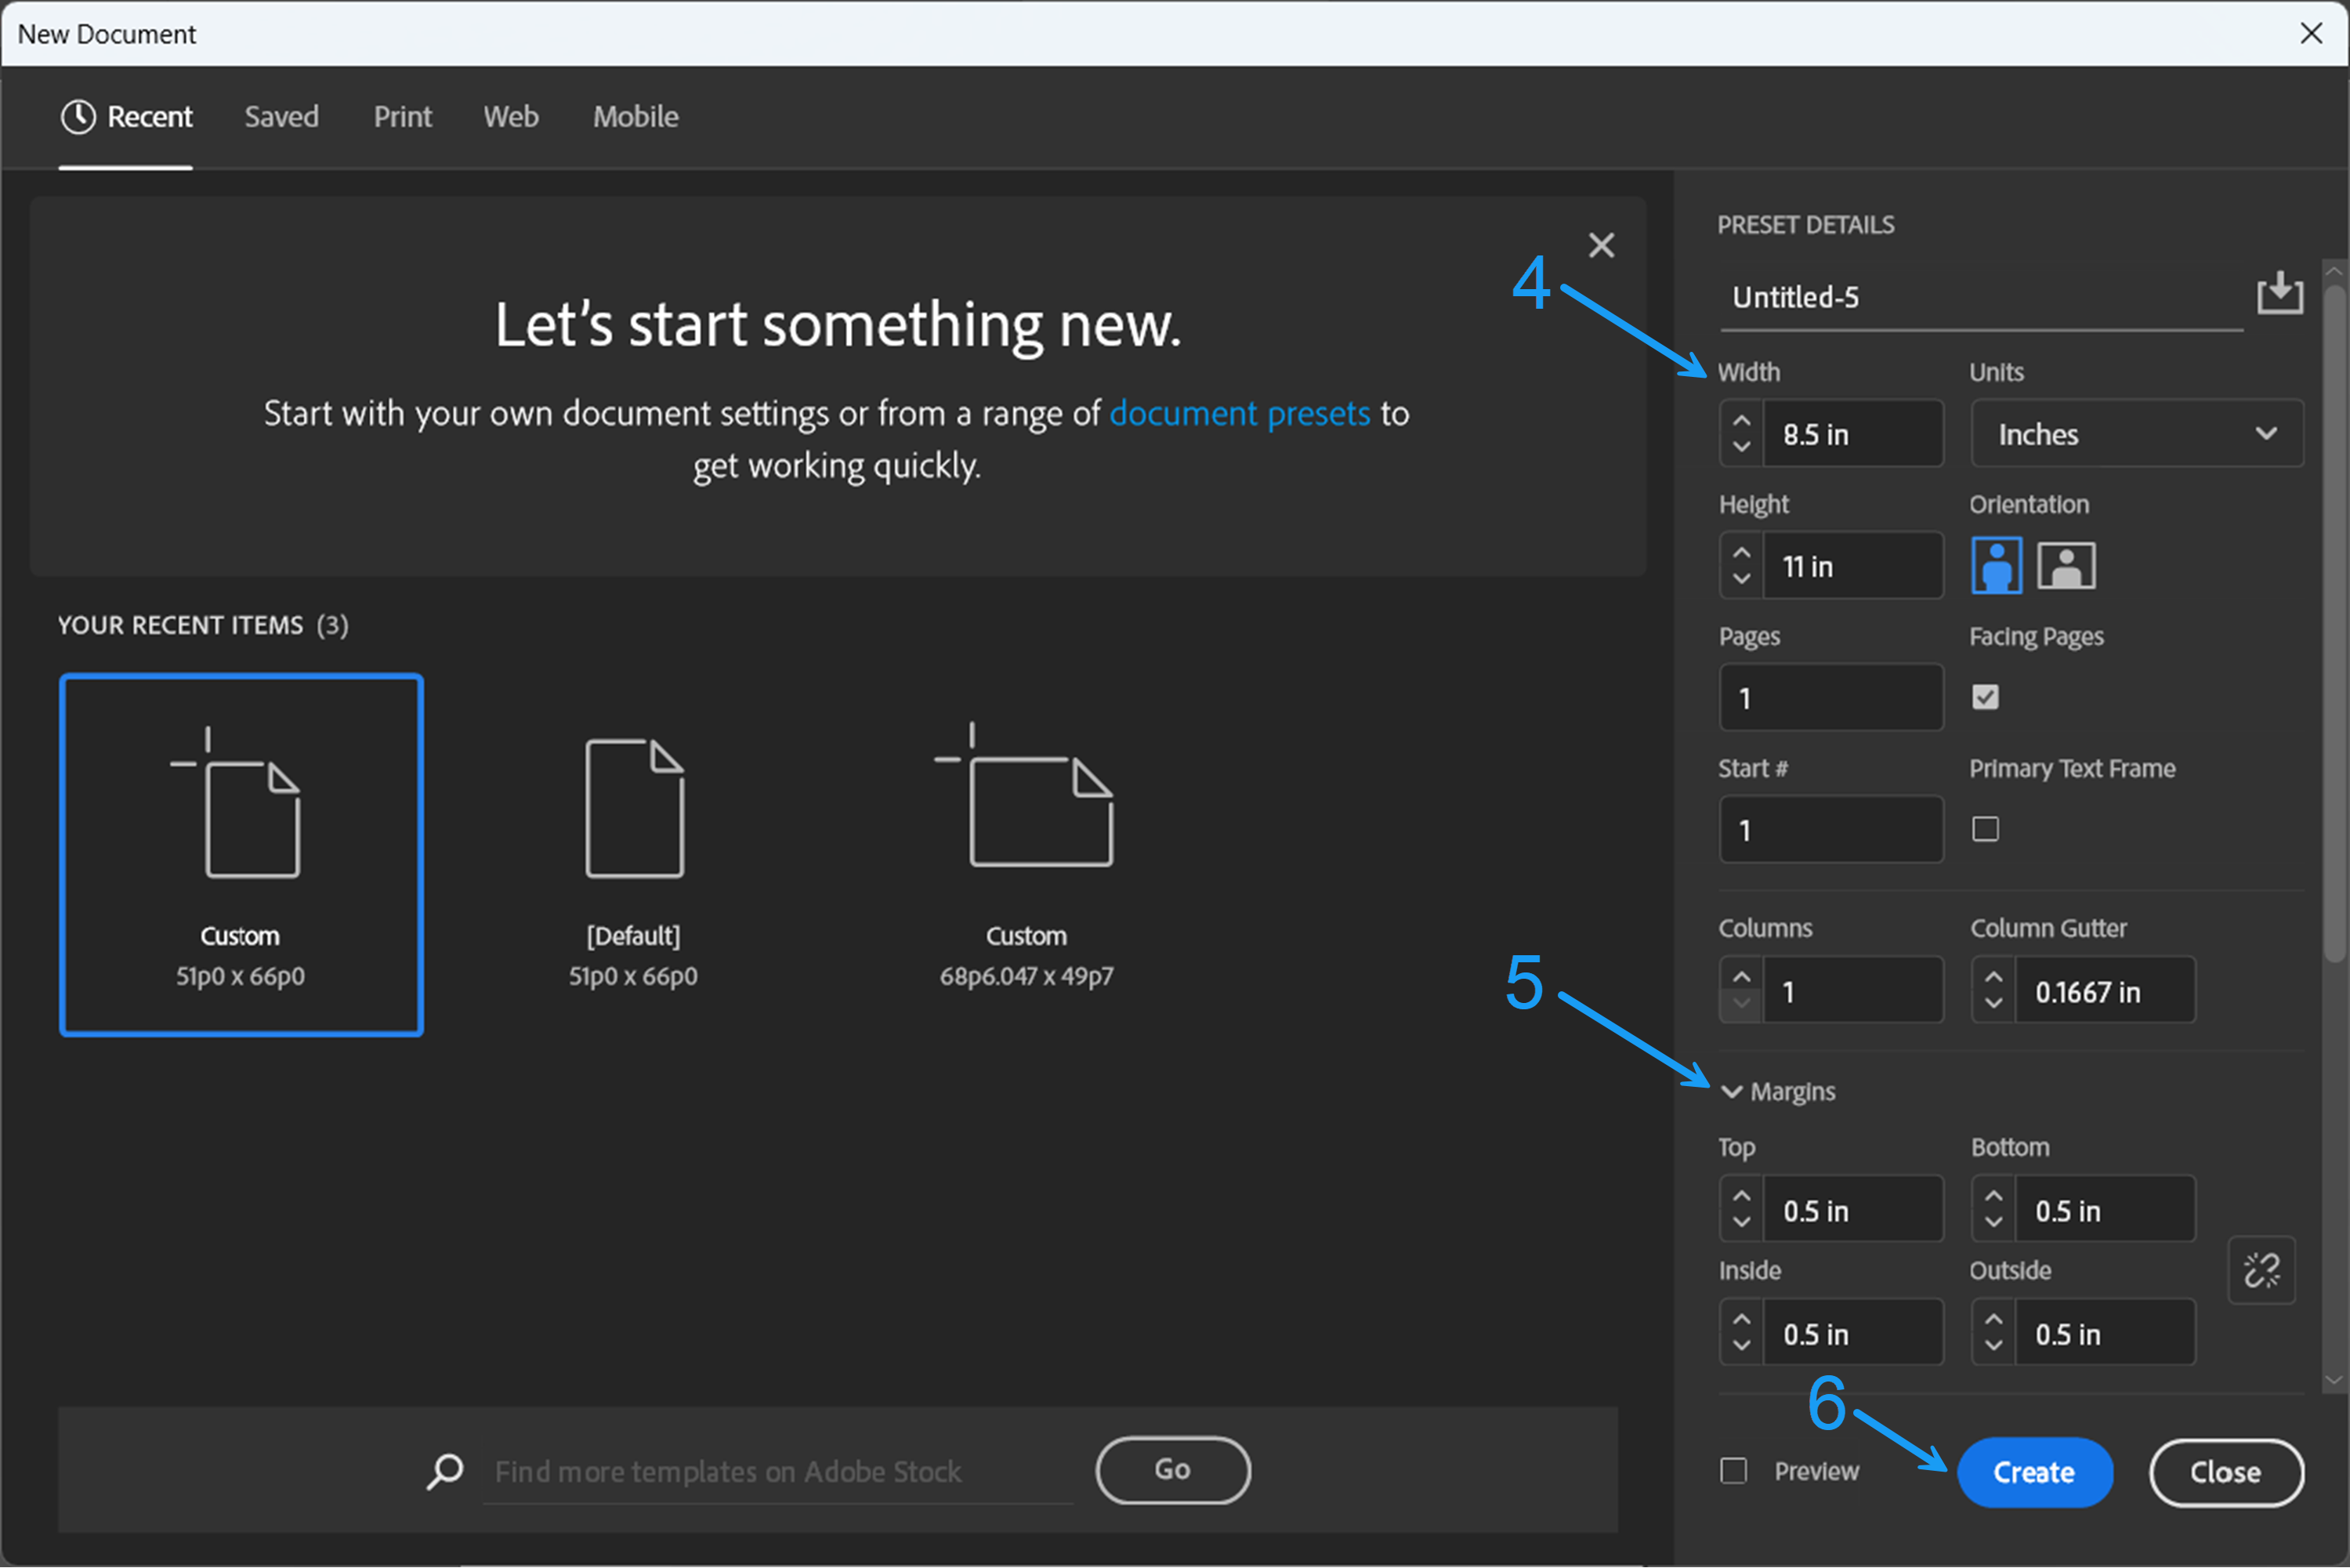
Figure 2: New document page settings. (Source: Noah Long)
Step 7: Click the Type Tool in the left toolbar.
Step 8: Click and drag from the top left corner to the bottom right corner to create a text frame.
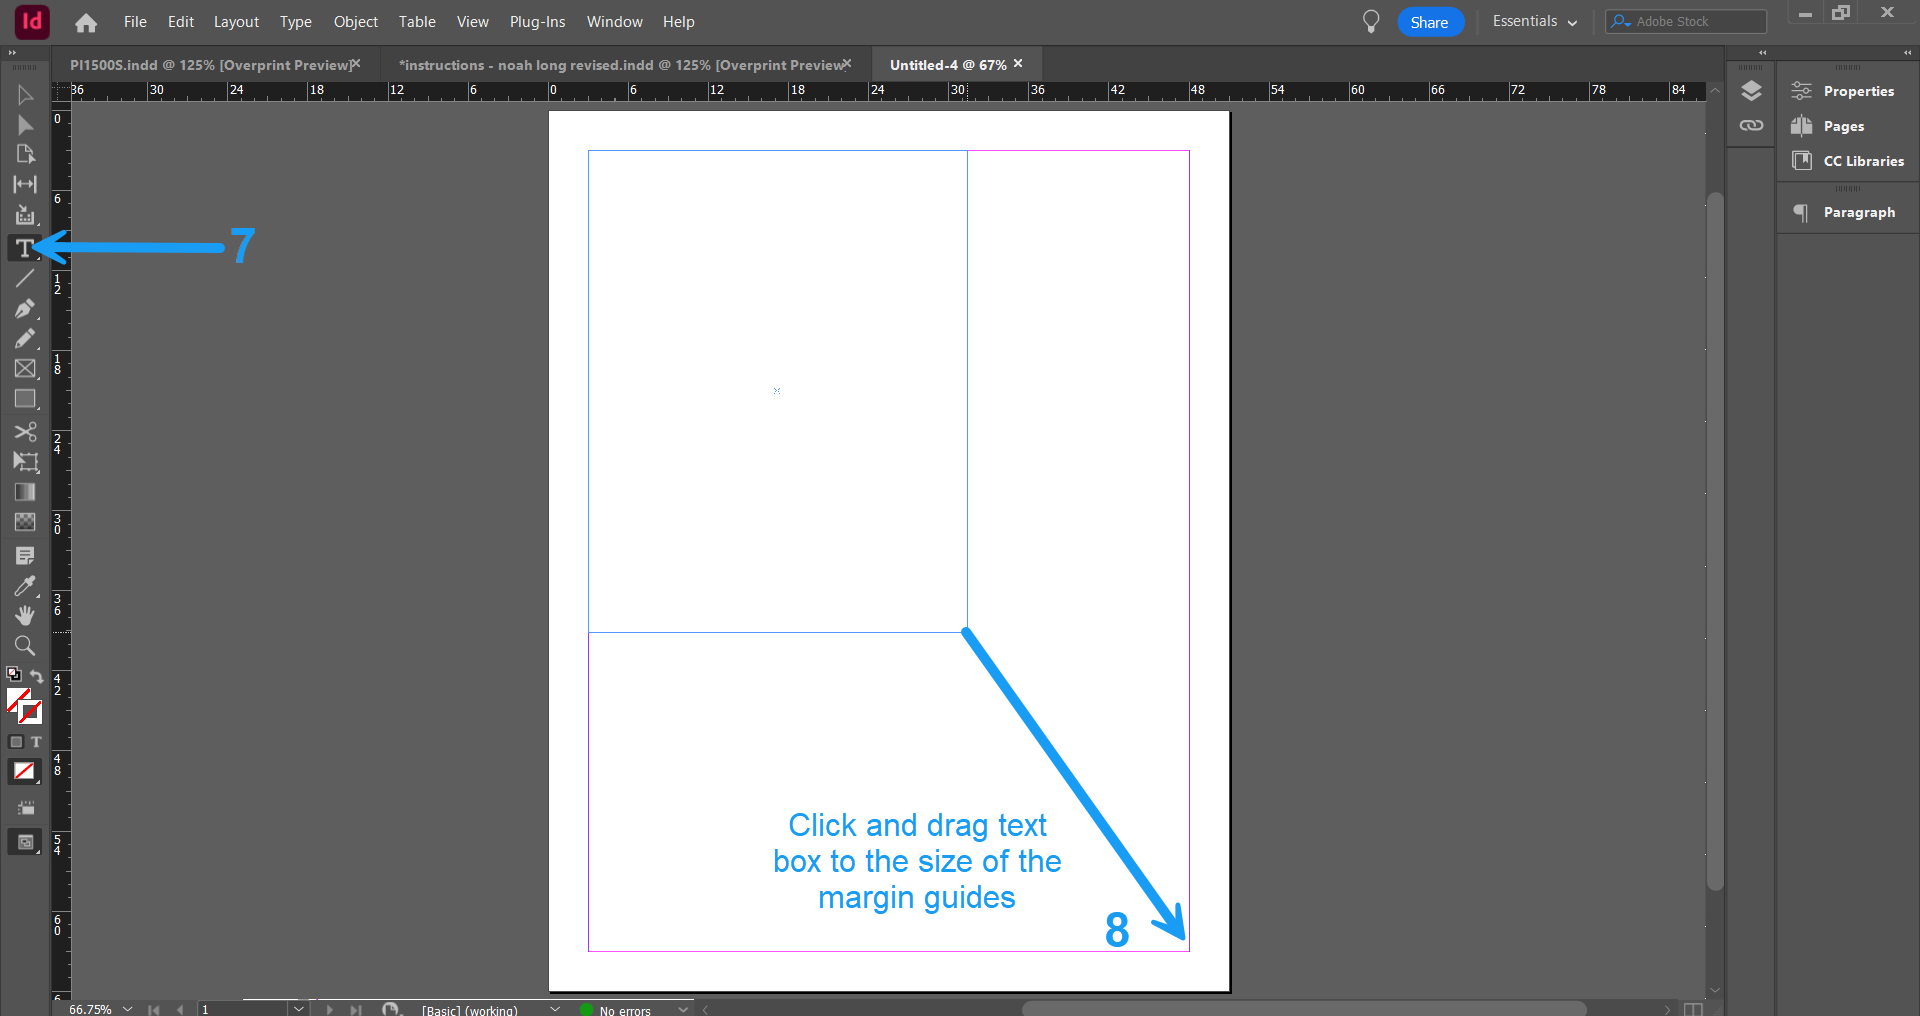
Figure 3. Size text box to screen. (Source: Noah Long)
Step 9: Click Object in the top menu.
Step 10: Click Text Frame Options to open the panel.
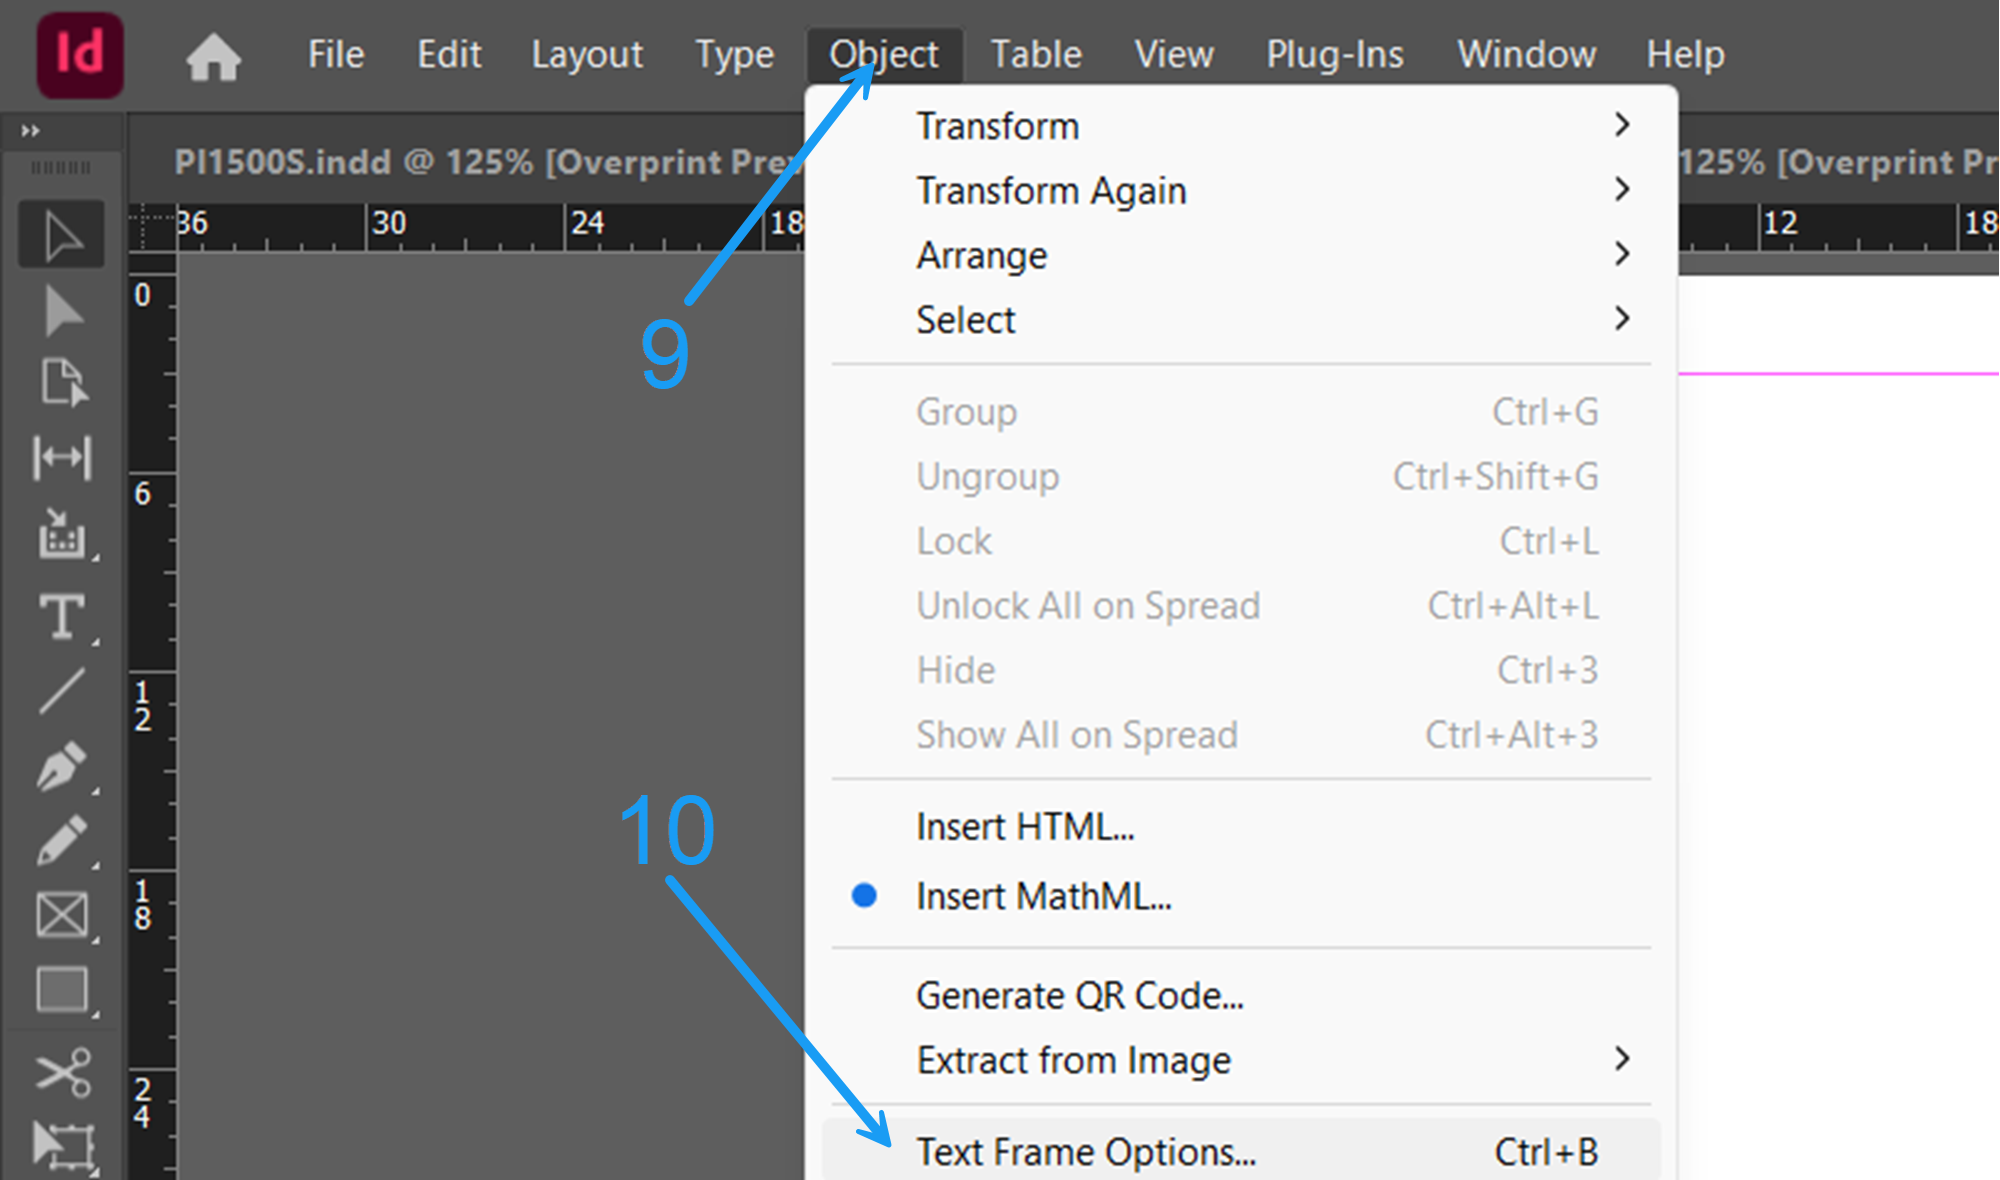
Figure 4: Opening Text Frame Options panel. (Source: Noah Long)
Step 11: Set the number of columns to 2.
Step 12: Click OK to apply the column settings.
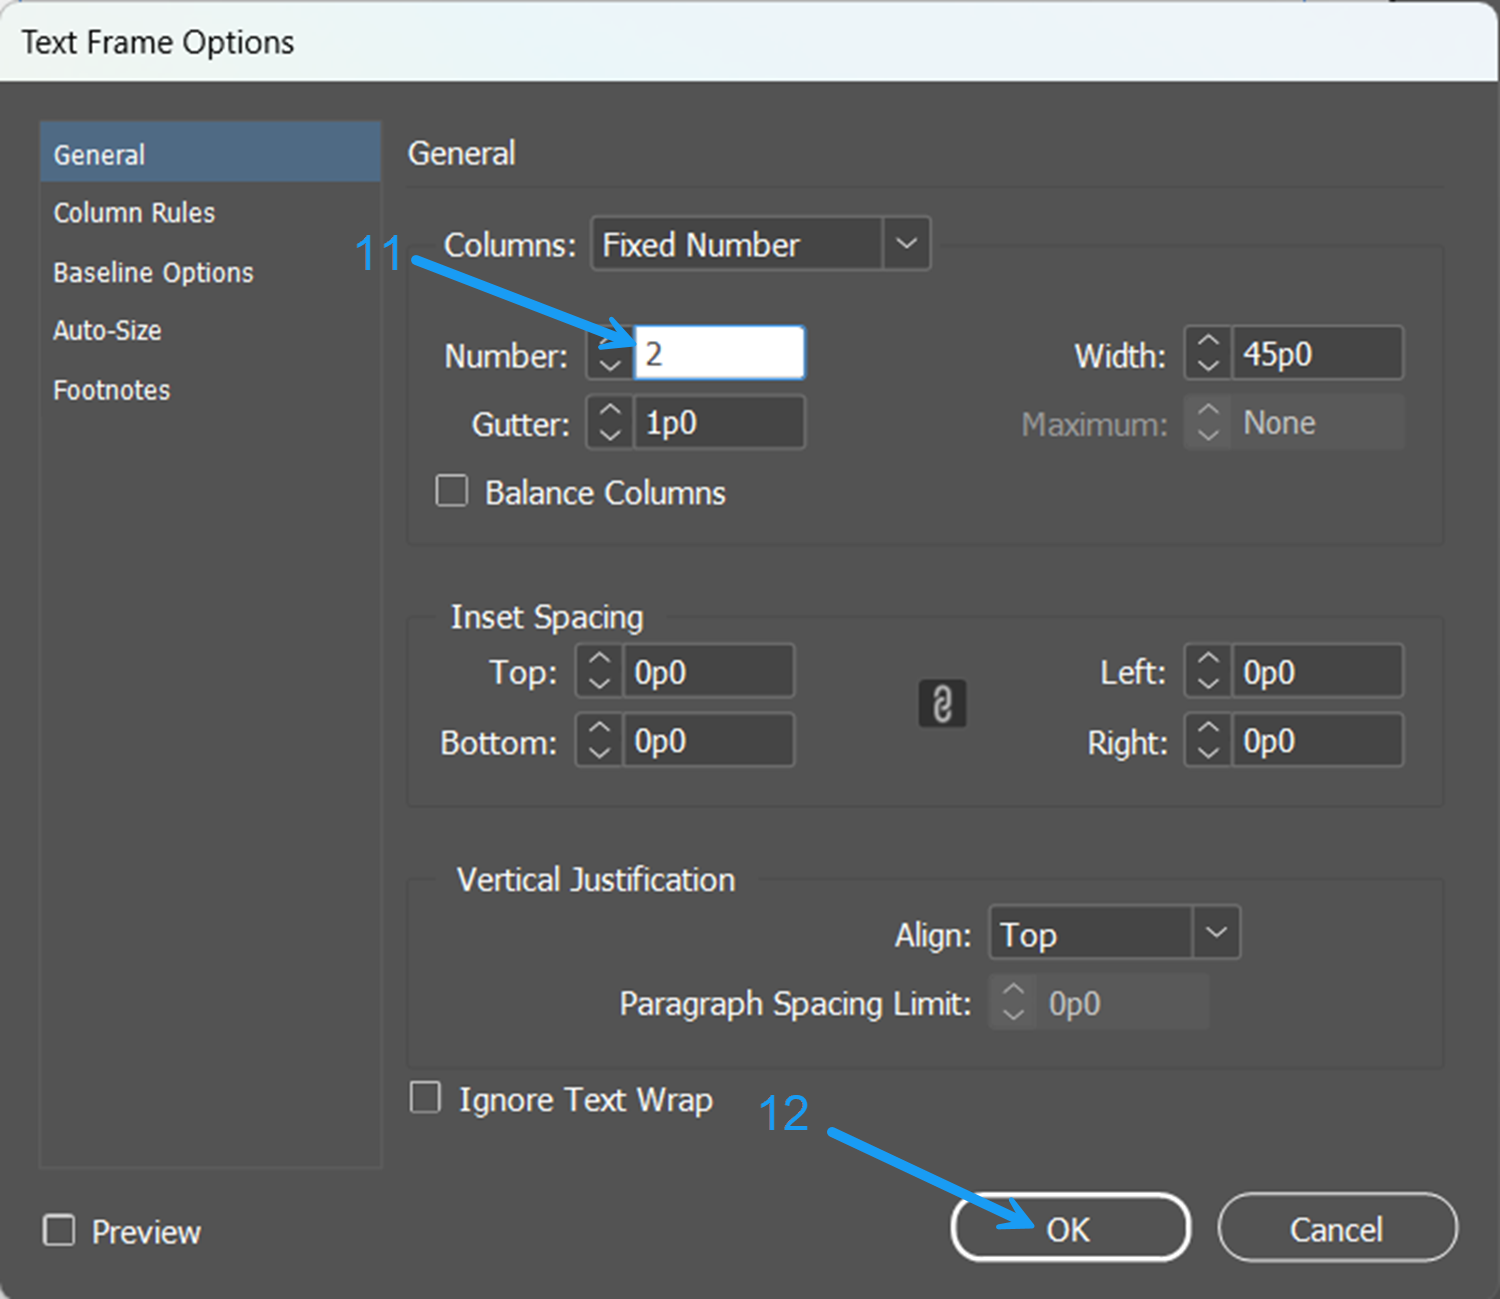
Figure 5: Column settings in Text Frame Options panel. (Source: Noah Long)
Step 13: Type or paste your text into the frame. It will automatically flow between the columns.
Step 14: Click File in the top menu.
Step 15: Click Save to save your document.